


Setting a priority level on a conversation helps your team triage the queue effectively — urgent issues get attention first, routine requests are handled in order, and nothing critical slips through. Priority levels are visible in the conversation list and in the conversation activity view, so the whole team stays aligned.
Priority Levels
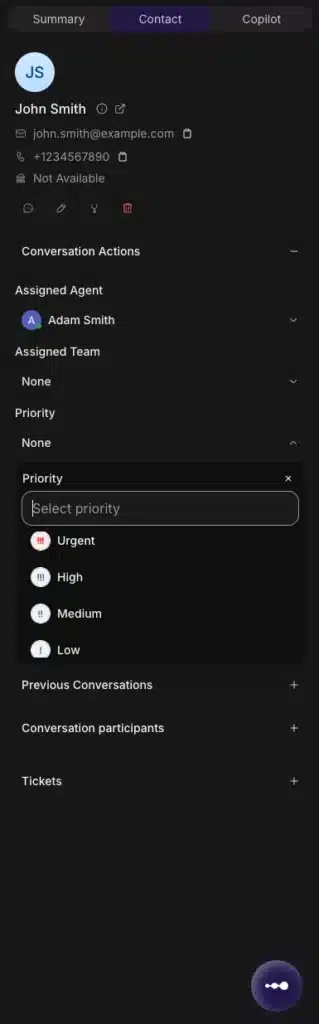
Inquirly uses four standard priority levels:
| Priority | When to use it |
| Urgent | Critical issues requiring immediate action — security incidents, outages, blocked payments, escalation requests |
| High | Time-sensitive issues where delay has a real impact on the customer |
| Medium | Standard support cases that need resolution but are not blocking the customer |
| Low | General questions and low-impact requests with no time pressure |
Note: Custom priority levels are not supported. For more granular categorization, use labels or custom attributes alongside priority.
How to Set a Priority
There are two ways to assign priority to a conversation. Use whichever fits your workflow.
From the conversation sidebar
- Open the conversation
- In the right-side details panel, locate the Priority section under Conversation Actions
- Select the priority level
Once set, the priority is immediately visible in the conversation list and in the conversation activity log.
From the command bar
- Open the command bar with ⌘ + K (macOS) or Ctrl + K (Windows/Linux)
- Type Assign Priority and press Enter
- Select the priority level from the list and press Enter again
Use this method when you are already inside a conversation and want to assign priority without moving your hands to the mouse.

Tips for Using Priority Effectively
Reserve Urgent for genuine emergencies. If Urgent is used too broadly, it loses meaning and agents stop treating it as a signal. Use it for situations where delay causes real harm — payment failures, security issues, service outages, or direct escalation requests from customers.
Use automation to assign priority at scale. Manually triaging every conversation is not sustainable at volume. Set up automation rules to apply priority based on conditions — for example, mark any conversation as Urgent when an email subject contains the word “security” or “outage.” This ensures consistent prioritization without relying on agents to catch everything.
Sort your queue by priority. Once priorities are assigned, use the Priority sort option in the conversation list to surface Urgent and High conversations at the top automatically. This gives your team a ready-to-work triage view every session.
Include priority in macros for repeatable workflows. When creating or editing a macro, add a Change Priority step and set the level. Any time that macro runs, priority is set automatically alongside the other actions in the sequence.
Frequently Asked Questions
Can I create custom priority levels? No. Inquirly uses four fixed levels — Urgent, High, Medium, and Low — to keep prioritization consistent and simple across the team. For more nuanced categorization, combine priority with labels or custom attributes.
Can priority be assigned automatically? Yes. Automation rules can assign or update priority levels based on conversation conditions. You can also trigger other actions when a conversation’s priority changes — for example, notifying a team lead whenever a conversation is escalated to Urgent.
Can I include priority in a macro? Yes. When creating or editing a macro, add the Change Priority step, select the level, and save. The macro will apply that priority level every time it runs.