


The Import Contacts feature lets you add multiple contacts to Inquirly at once using a CSV file. Instead of creating contacts one by one, you download a ready-made template, fill it with your contact data, and upload it back to Inquirly.
This is the recommended method when migrating from another tool or onboarding a large existing customer list.
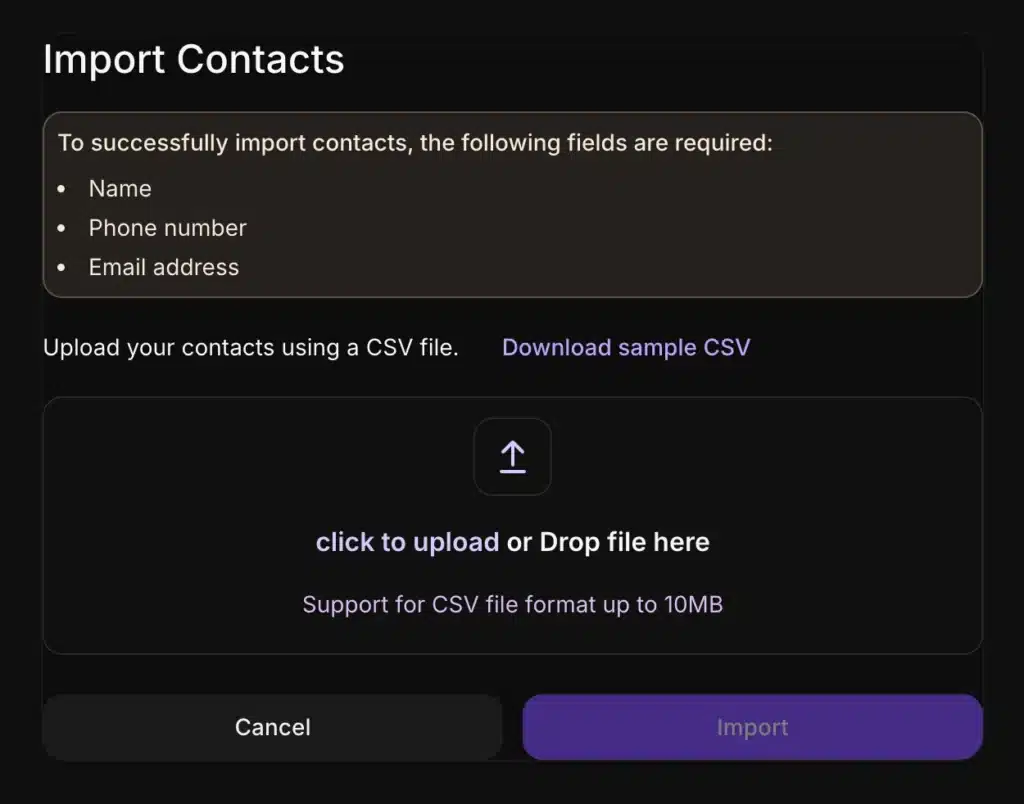
Before You Start: Required Fields
Every row in your CSV must include valid values for these three fields:
| Field | Required |
| Name | Yes |
| Phone number | Yes |
| Email address | Yes |
If any of these fields are missing — either the column is absent from the file or an individual row has no value — that row will fail validation and will not be imported. Other valid rows in the same file can still be imported successfully.
Step 1: Download the Sample CSV Template
In the Contacts module, click Import in the top-right corner to open the Import Contacts dialog. Click Download sample CSV to get the template.
The template includes:
- The three required fields (Name, Phone number, Email address) pre-formatted as column headers
- Columns for any custom attributes you have configured in Inquirly, with the correct column names and expected value types already in place
Important: Do not change the header row after downloading. Inquirly uses the column names in the header row to map data correctly during import — including mapping your custom attributes to the right fields. Renaming or reordering headers will cause mapping errors.
Step 2: Fill in the CSV
Add one contact per row. Follow these rules:
Required fields — every row must include a value for Name, Phone number, and Email address.
Custom attribute columns — fill these in if you want to store additional structured data on the contact. If a custom attribute is not relevant for a particular contact, leave that cell empty.
Custom attribute value types — enter values that match the attribute type defined in Inquirly:
- Text attributes → enter text
- Number attributes → enter numeric values
- Boolean-style fields → follow the expected format used by your workspace
Using the downloaded template as your starting point is strongly recommended — it shows you exactly which custom attribute columns exist and prevents header naming errors.
Step 3: Upload the CSV and Start the Import
- Open the Import Contacts dialog (Contacts → Import button, top-right)
- Drag your CSV into the upload area, or click click to upload to browse for the file
- Click Import to begin processing
File size limit: CSV files up to 10MB are supported.
During import, Inquirly validates each row individually. Rows with missing required fields or invalid formatting are rejected. Rows that pass validation are imported — a partially valid file does not need to be fully correct for some contacts to be added.
Step 4: Review the Import Results
After the import finishes, Inquirly sends a confirmation email to your account address. The email includes:
- The number of rows imported successfully
- The number of rows that were not imported
If any rows failed, review the rejected rows against the required fields and custom attribute formatting rules, correct the issues, and re-import only the corrected rows.